Sea Kayak Rescues Modified for a COVID-19 World
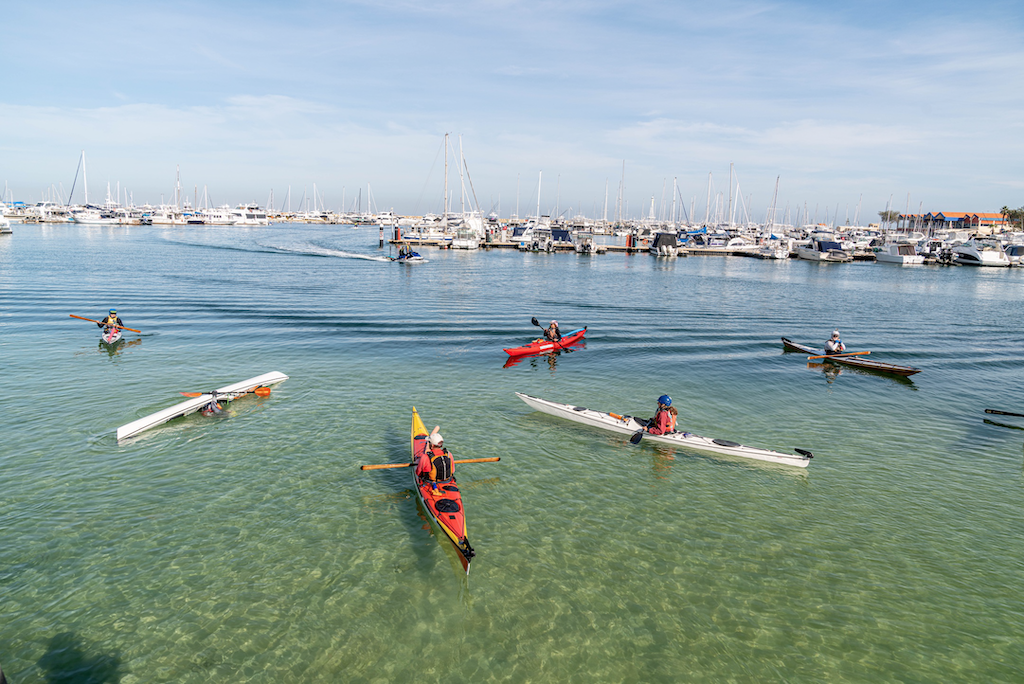
Many of us are looking forward to regular club paddles resuming. Sea Kayak Club WA are voluntarily completing a COVID19 safety plan. Physical distancing is still in place in the community, so it is important that we consider how we might adapt ways that we come together, including rafting up and handling rescues. On 17 May, some Sea Kayak Club WA paddlers conducted an on-water workshop to experiment with ideas for adapting conventional rescues to suit COVID19 safety. As a club, we will be a stronger and more capable team if we conduct training and get out and practice these skills together. Here are some practical skills that that you can explore. We encourage you to work on developing at least 3 ways to recover from a capsize, including assisted rescue styles as the rescuer and rescuee.
Self-Rescue Techniques
The ultimate sea kayak self-rescue is the Eskimo roll, but even the most experienced of paddlers swim sometimes. If Sea Kayak Club WA are skilled in self-rescue, then in the event of a capsize, the paddler may be able to Eskimo roll or use one of the following techniques to get back into their kayak:
1. Swim to Shore
In some instances, it may be easy to just swim to shore, empty out the water and re-launch.
Advantages: Self Rescue technique suitable for all levels of paddler.
Disadvantages: Not suitable if you are a long way from shore or if the shore is not suitable for landing (e.g. cliffs).
2. Paddle Float Re-entry
Advantages: This Self Rescue Technique is suitable for Intro to Sea Skills level paddlers as a buddy rescue and Sea Skills level paddlers as a self-rescue, this is basically the Back Deck Rescue (listed below) with a paddle float as a means of support. The paddle float can provide extra stability required and helps if you are in rough water.
Disadvantages: It takes quite a bit of time to set up for the rescue, for that reason, people prefer assisted rescues
3. Cowboy Style Self Rescue (aka The Scramble Rescue)
Advantages: Self Rescue Technique, you can use this if you are paddling solo, maintains social distancing, this rescue can be adapted as an assisted rescue with the rescuer stabilising from the bow as the paddler re-enters.
Disadvantages: High centre of gravity can make this difficult in rough water, may be difficult for some kayaks (tippy).
4. Laying on the Back Deck Self Rescue
To keep a lower centre of gravity when re-entering, you can lay face-down on your back deck, either at your back hatch or just behind the cockpit and swing your legs around into the cockpit and wiggle down until your bum is above the seat. Then turn over.
Advantages: Self Rescue Technique, you can use this if paddling solo, it can be done with or without the paddle float. This rescue style has a lower centre of gravity than the cowboy method.
5. Re-enter & Roll using a paddle float
Advantages: This technique can be used in rougher conditions where the other self-rescues may have failed.
Some paddlers can do this, even if they are still learning to eskimo roll. It’s a great skill builder for paddlers working toward their Sea Skills or learning to eskimo roll.
6. Re-enter and Roll (Sea Skills Level Paddlers)
Advantages: This technique can be used in rougher conditions where the other self-rescues may have failed.
Assisted Rescues for the COVID19 Era
We are going to make some simple adjustments. Think 1.5m distancing, wearing a neck buff to pull up over nose and mouth if required, face away from others, cover your eyes with sunglasses, mini hand sanitiser in your PFD pocket, everyone carrying their own personal first aid kits, paddlers communicating more on VHF radios etc..
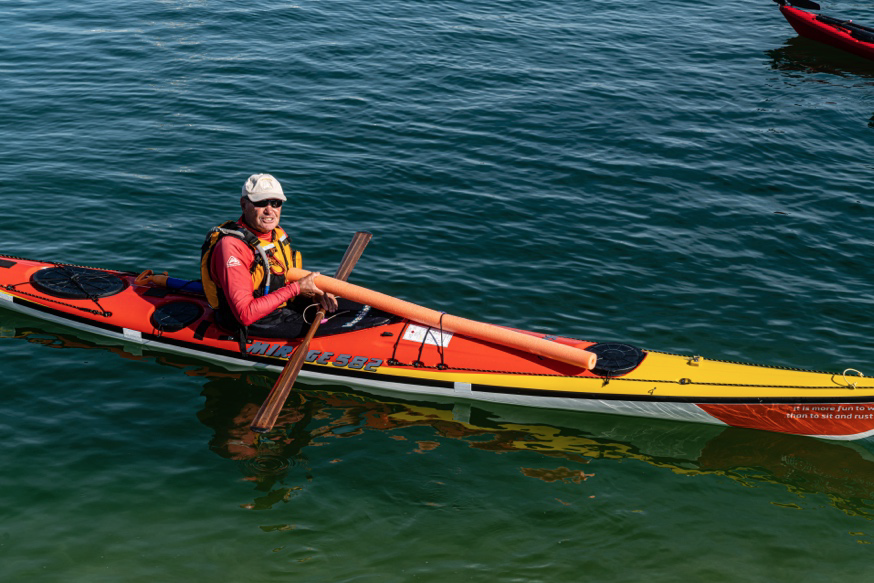
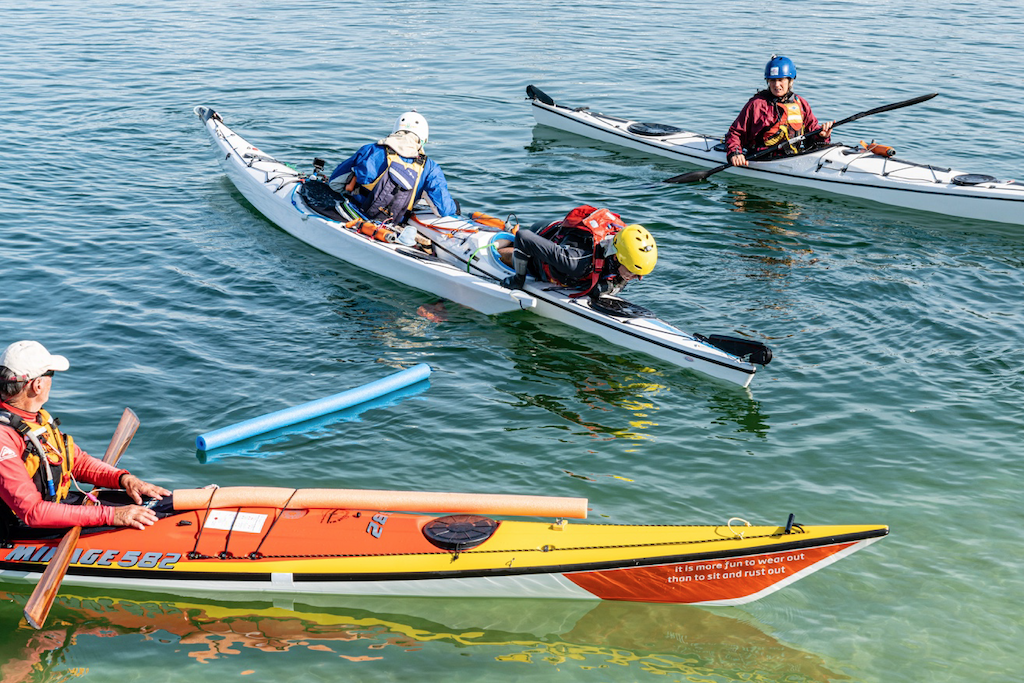
In our workshop we used pool noodles to illustrate the social distancing of 1.5m. For most of our single kayaks, the front hatch was 1.5m from the face of the paddler. As they move around to re-enter the kayak, the rescuer or person assisting needs to move to an appropriate position accordingly.
Self-rescue techniques can be adapted to be assisted rescues with other paddlers coming in to provide support by holding the kayak at the bow or the stern.
- Get together and practice the assisted techniques to figure out what works best for you. Holding the kayak at thebow and/or the stern may be less stable than when we could get in and hold the kayak close to the cockpit.
- Check your deck perimeter lines are in good condition because the rescuer may need to apply a lot of pressure to them as they use them to stabilise the kayak, it’s not fun when they snap mid-rescue.
Take care when practicing, we don’t want to see sprain and strain injuries when experimenting with new rescuestyles. Try and practice first with a paddler who is similar size/weight to you. Choose the rescues that you can adapt to easily before working on the more difficult ones.
Self-rescue techniques can be adapted to be assisted rescues with other paddlers coming in to provide support by holding the kayak at the bow or the stern.
- Get together and practice the assisted techniques to figure out what works best for you. Holding the kayak at the bow and/or the stern may be less stable than when we could get in and hold the kayak close to the cockpit.
- Check your deck perimeter lines are in good condition because the rescuer may need to apply a lot of pressure to them as they use them to stabilise the kayak, it’s not fun when they snap mid-rescue.
- Take care when practicing, we don’t want to see sprain and strain injuries when experimenting with new rescue styles. Try and practice first with a paddler who is similar size/weight to you. Choose the rescues that you can adapt to easily before working on the more difficult ones.
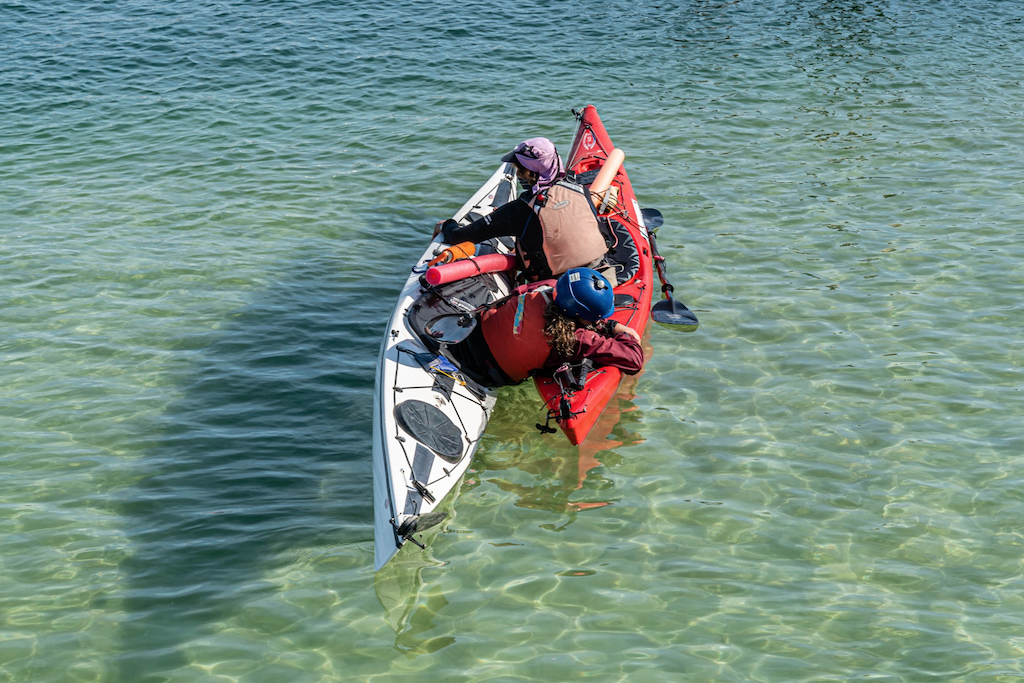
1. Standard T Rescue (Intro to Sea Skills Level Rescue Technique)
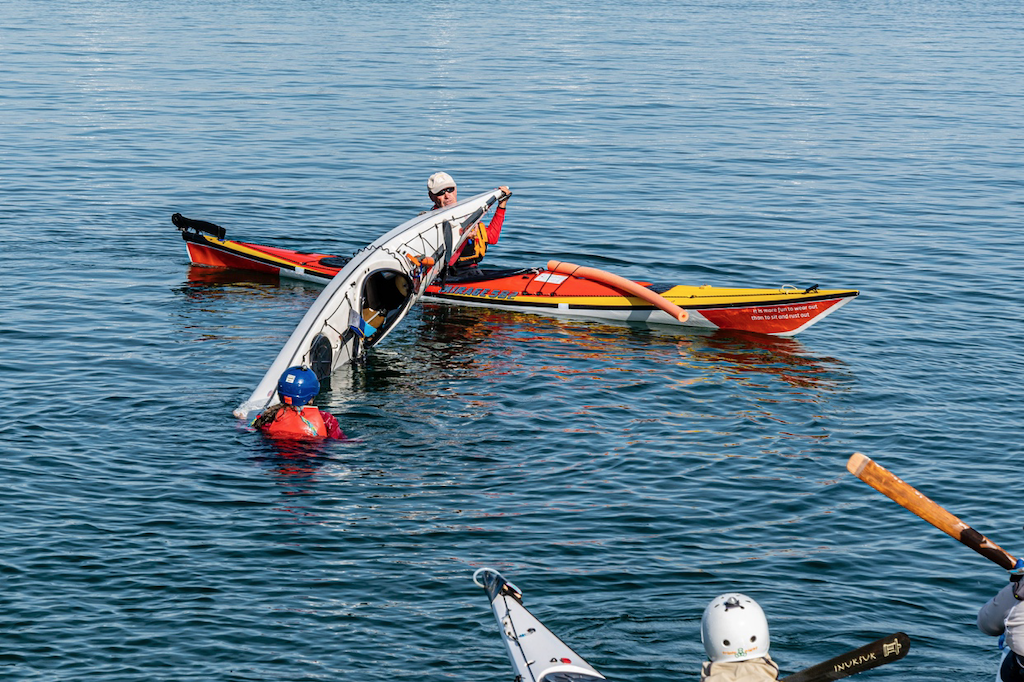
In the video you’ll see that this is like a standard T-rescue, but involves the deliberate looking away element and moving to keep away from the infection centre i.e. mouth and nose.
KP demonstrates it well.
Advantages: A rescue that we are all familiar with, we just need to learn the adaptions for being COVID aware. The Rescuer found this rescue easy to perform and control. We think most paddlers and rescuers would be able to complete this rescue, so it’s a good one for the toolbox.
Disadvantages: You need to slide through the rescuees 1.5m bubble while back to back/facing away from each other. So physical distancing is not as perfect as in the heel-hook entry which is described next.
Watch SKCWA Video:
2. Heel Hook Assisted Rescue
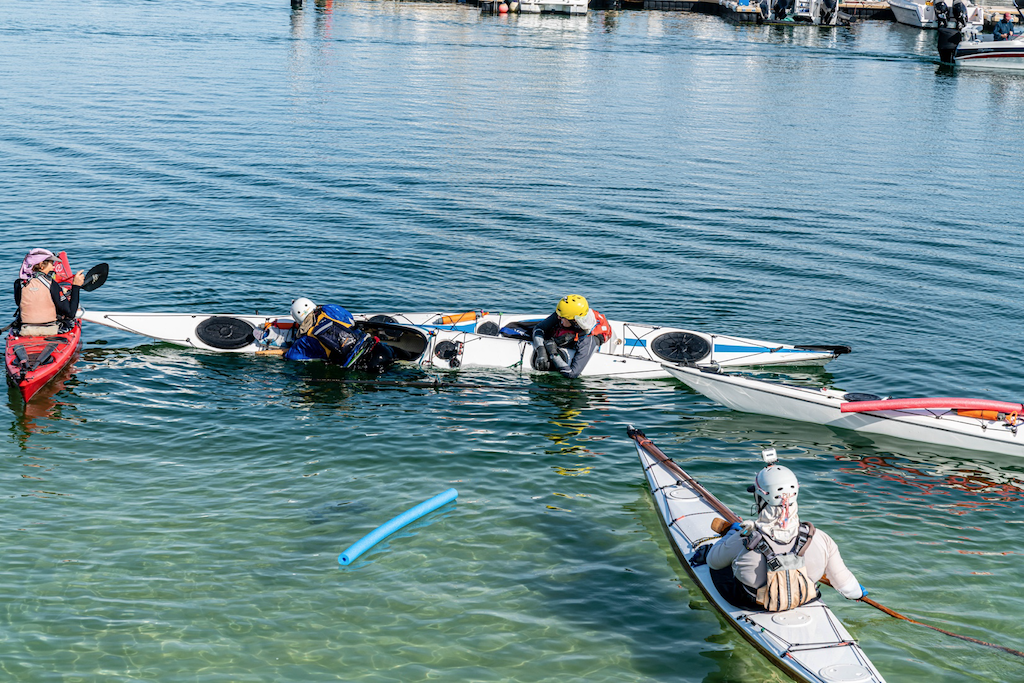
Usually when you re-enter the kayak using a heel hook, the rescuer holds near the cockpit of your kayak. We’ve adapted this so the rescuer provides the stability from further away. Paddlers got better at this by practicing. We found that it may help to have other kayaks coming in to provide stability at the bow/stern. See Steve & Andrew’s There is another video from Tue Olsen showing this technique (it’s at the end of this document)
Demo here:
Advantages: Fast and stable re-entry with low centre of gravity, rescuer empties the cockpit before you re-enter, the kayaker doing the heel hook to climb back into their cockpit can clasp the rescuers deck lines with their own to connect the two kayaks and create stability.
Disadvantages: Some rescuers found providing the stability was difficult because they were so far away from the cockpit due to social distancing, if the rescuer is facing away it created a communication problem and other paddlers were brought in to bridge that communication gap, kayaks with a low deck profile took on water while the paddler was climbing onboard.
3. Assisted Re-enter and Roll
The kayaker re-enters their kayak and then uses the bow of another kayak for support so they can roll back upright.
Advantages: A good rescue for paddlers who are working toward or at Sea Skills level. Can be performed in rough water. Steve thinks this one is the easiest to do!
Disadvantages: The paddler comes up with a boat that is full of water and may require help stabilising while pumping out – see rafting up tips on the next page.
Click to watch Steve’s excellent Demo as he is rescued by Jill:
4. Eskimo T Rescue
To learn the Assisted Re-enter and Roll rescue (above), you can first practice the Eskimo T Rescue and then work up to being able to do the assisted re-enter and roll.
Advantages: Fast and simple for those paddlers who can roll up this way. This is a great technique to have in your toolbox because you don’t have to wet exit. Practicing this technique leads to confidence in other techniques. Whitewater paddlers and canoe polo paddlers also use this rescue.
Disadvantages: You might be holding your breath for a while and feeling for the rescuer coming in. Rescuers sometimes ram your hand as they try to connect.
Rescues & Towing for Injured Paddlers
Participants and Sea Leaders attending club paddles will need to acknowledge that there are some situations where a kayak rescuer may have to abandon physical distancing e.g. when managing a paddler with a dislocated shoulder, you need to scoop rescue and you need to support them during towing. In this case you can use items of personal protective equipment (PPE) to minimise risk of infection. Consider improvised PPE such as pulling up a buff over your nose and mouth, putting sunglasses on or wearing your snorkel mask. You may consider having a pair of face masks accessible. We experimented with ways of supporting a seasick or tired paddler for towing. Offsetting kayaks, the distance apart was more like 1m (see pool noodle as a visual reference in the adjacent photo). In this assisted tow, the rescuers back is to the rescuee and the buff and sunglasses were used as PPE. A tow could be attached to these rafted kayaks.
Stirrup Assisted Re-entry
This one may evolve further. The rescuer carries a long webbing strap with adjustable sliding buckle, this is looped around the kayak and then slid forward and the strap placed over the rescuee’s kayak so that they have a stirrup of strap to stand in for climbing up and re-entering. Watch:
Advantages: Could be used for an extremely tired kayaker or an injured kayaker (maybe), really easy for the rescuer to stabilise the kayak, positive strap hand hold for the rescuee to pull up on and stirrup to step in, good social distancing, another paddler can come in at the stern to assist in T-formation
Disadvantages: Complex set-up would be best practiced prior so everyone understands it, limited capability as not suitable for rough water, paddler can get strap wrapped around their legs.
Rafting Up
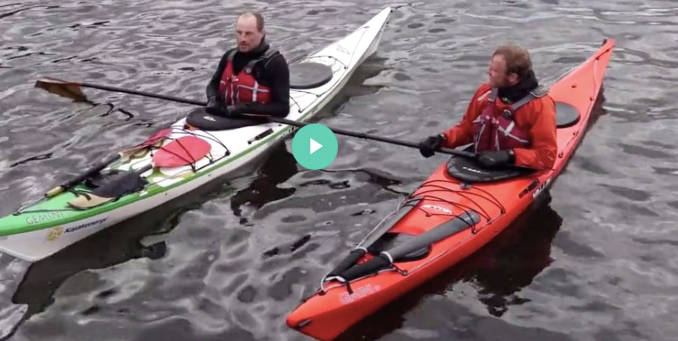
After our SKCWA workshop, we found that a Danish Kayak Instructor, Tue Olesen, had written up some similar
techniques to those we discussed and added in some ideas about formations for distanced rafting up. It is definitely worthwhile taking a look at his instructional videos here, the photos above are screenshots from Tue’s videos:
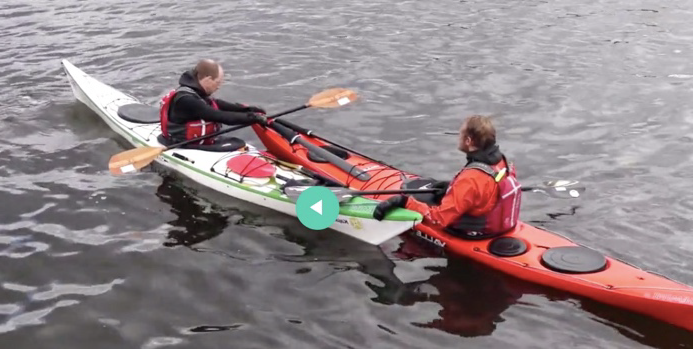 blob:https://www.onadventure.dk/03f1b498-9cf0-4554-bc0b-8b6fa16432e0
Have a look at some of Tue Olesen’s other videos on how to keep social distancing in rescues
https://www.onadventure.dk/assisted-kayak-rescues-and-rafts-with-increased-distance
A paddler from Canada, Mike Gilbert has also shared a video of rescue techniques that he tried out with some useful judgement comments which helps you decide which rescue technique you’ll pull out of your toolbox. His idea of stabilising using a paddle between the kayaks was interesting:
As more videos merge, let’s share them on the Sea Kayak Club WA Facebook Page. We are mindful that things keep changing in the government and community responses to COVID19, so our response as a club will also be a dynamic one. When paddles recommence, you may start to notice and will be informed about some small changes in the way that we organise things. For example, Sea Leaders may email out the paddle sign on sheet and ask you to sign offon the paddle disclaimer and submit your emergency contact information prior to the paddle via email. These are just small changes that reduce our risks and they are a part of our COVID-safe plan. We will be keeping diligent records of paddlers attending club events so that we have lists required if contact tracing is necessary. Paddle Australia encourages all members to download the COVID-safe phone app.
Barry Roberts from SKCWA kindly photographed our distanced rescues workshop and captured the images in this write-up. Original SKCWA videofootage is created by Pel Turner & Sandy Robson. Thanks to the SKCWA paddlers who participated in the ideas workshop: Andrew Munyard, Steve Haddon, Kevin Piper, Jill Sievenpiper, Ann Smithson, Pel Turner & Sandy Robson.
Here’s our Tangled mess of Out-takes Video:


